This tutorial demonstrates the process of simulating the melting of cream using an axisymmetric model in FLUENT.
1. Launch Workbench and Create an Analysis Project
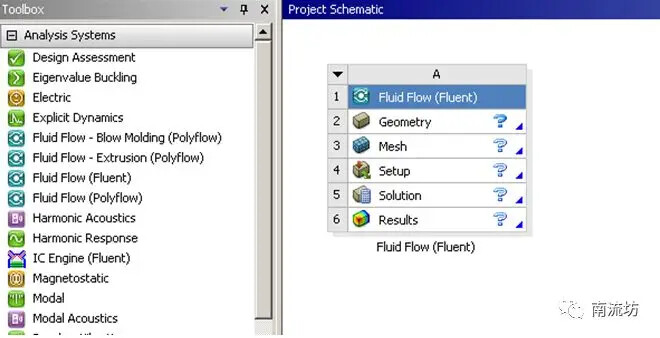
(1) On a Windows system, go to “Start” → “All Programs” → “ANSYS 2020” → “Workbench”, and launch Workbench 2020 to open the ANSYS Workbench interface.
(2) Double-click the “Analysis systems” → “Fluid Flow (Fluent)” option in the Toolbox of the main interface to create an analysis project, referred to as “A”, in the Project Schematic.
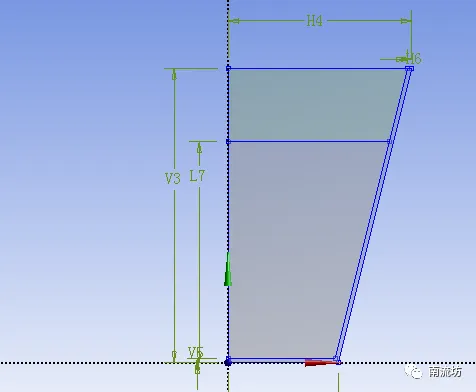
2. Import Geometry
(1) Right-click on “Geometry” in the A2 section and select “Import Geometry” → “Browse” from the context menu. This will open the “Open” dialog box.
(2) In the “Open” dialog, select the file path and import the geometry file.
3. Mesh Generation
(1) Double-click the “Mesh” item in the A3 section to enter the Meshing interface, where the model mesh will be generated.
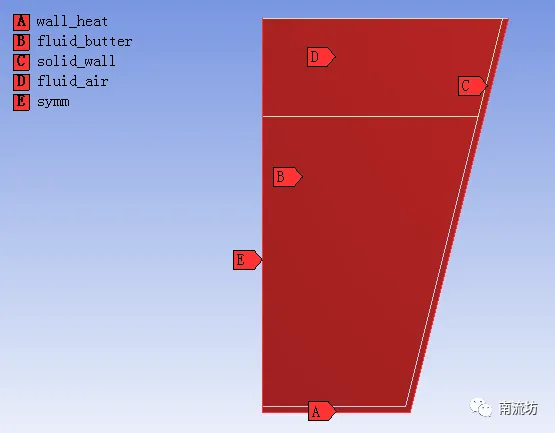
(2) Right-click each boundary, select “Create Named Selection” from the context menu, and the “Selection Name” dialog will pop up. Enter names such as “wall_heat” for the heated wall, “fluid_air” for the fluid domain (air), “fluid_butter” for the fluid domain (butter), “solid_wall” for the solid domain, and “symm” for the symmetry boundary. Click OK to confirm.
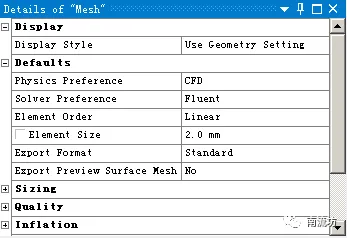
(3) Set the mesh parameters, with “Element Size” set to 2mm.
(4) Right-click the “Mesh” option in the model tree and choose “Generate Mesh” from the context menu to begin mesh generation.
(5) Once the mesh is generated, click on “Mesh” in the model tree to view the mesh in the graphics window.
(6) Close the Meshing interface by executing the “File” → “Close Meshing” command to return to the Workbench main interface.
(7) Right-click the “Mesh” item in the Workbench interface and select “Update” from the context menu to update the mesh data to the Fluent analysis module.
4. Define the Model
(1) Double-click on the “Setup” item in the A4 section to open the Fluent Launcher dialog. Click OK to enter the FLUENT interface.
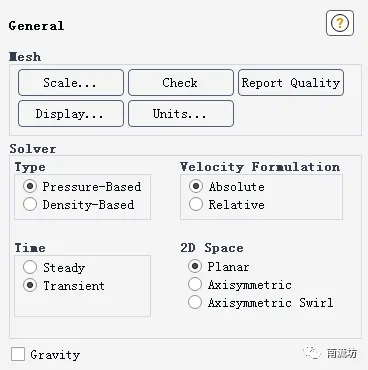
(2) In the FLUENT interface, click on the “General” button in the tree structure to open the “General” (Overall Model Setup) panel. In the “Solver” section, select “Transient” for Time.
5. Set Materials
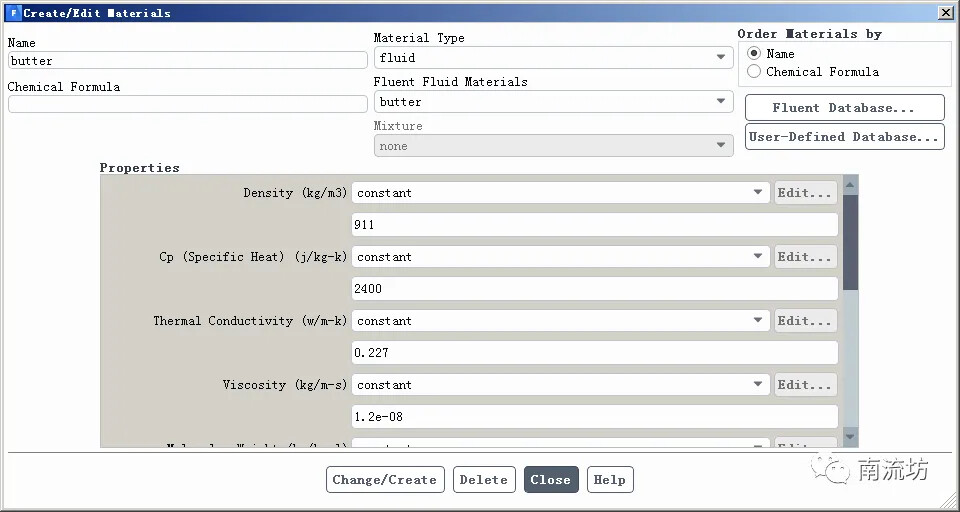
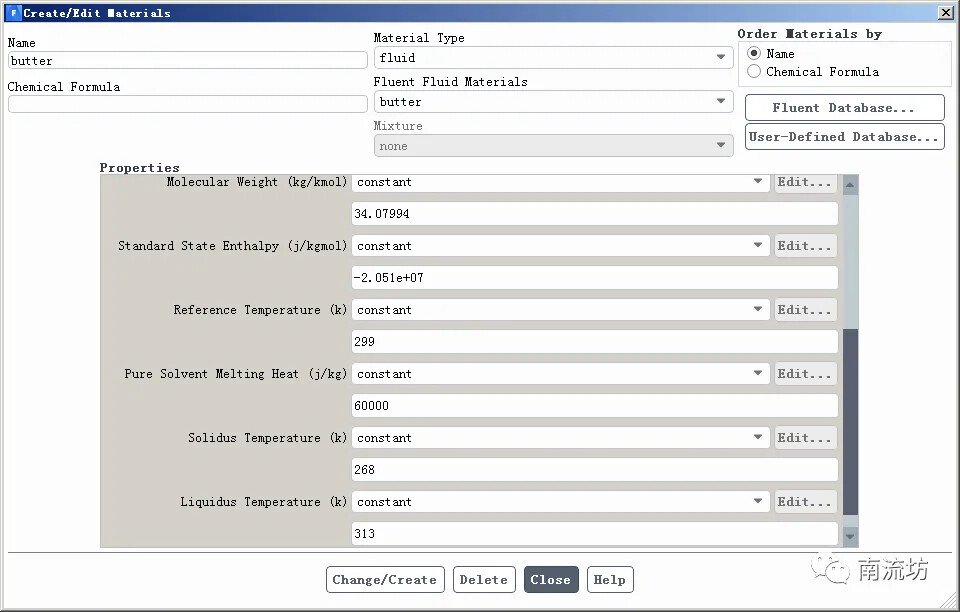
(1) In the main menu, go to “Setting Up Physics” → “Materials” → “Create/Edit” to open the “Create/Edit Materials” dialog. Click the “Fluent Database” button to open the Fluent Database Materials dialog. Create a new material, “butter,” with the specified parameters, and click “Copy” to confirm.
6. Set Multiphase Flow
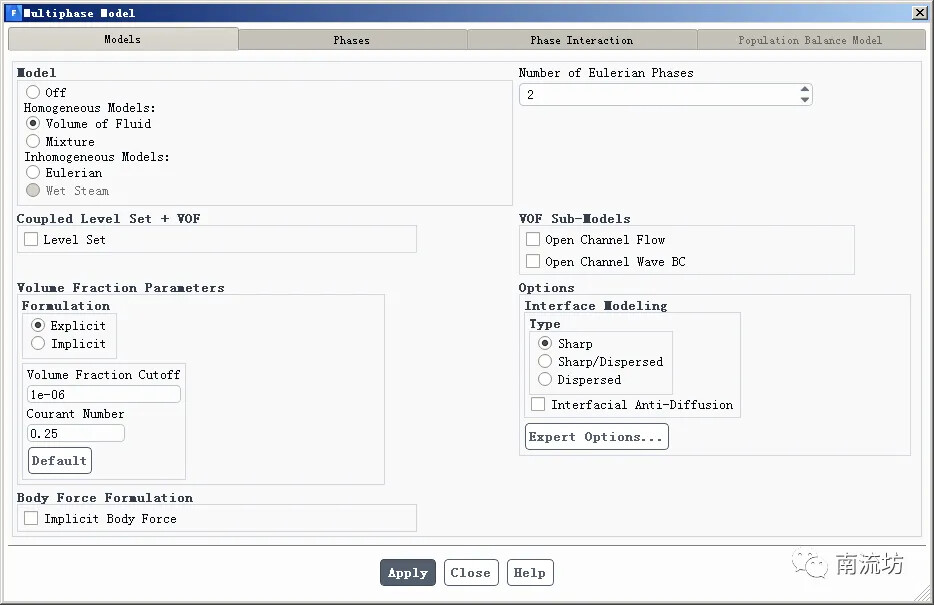
(1) In the “Models” panel, double-click on the “Multiphase” button to open the “Multiphase Model” dialog. Select “VOF,” set “Number of Eulerian Phases” to 2, and click OK to confirm and close the dialog.
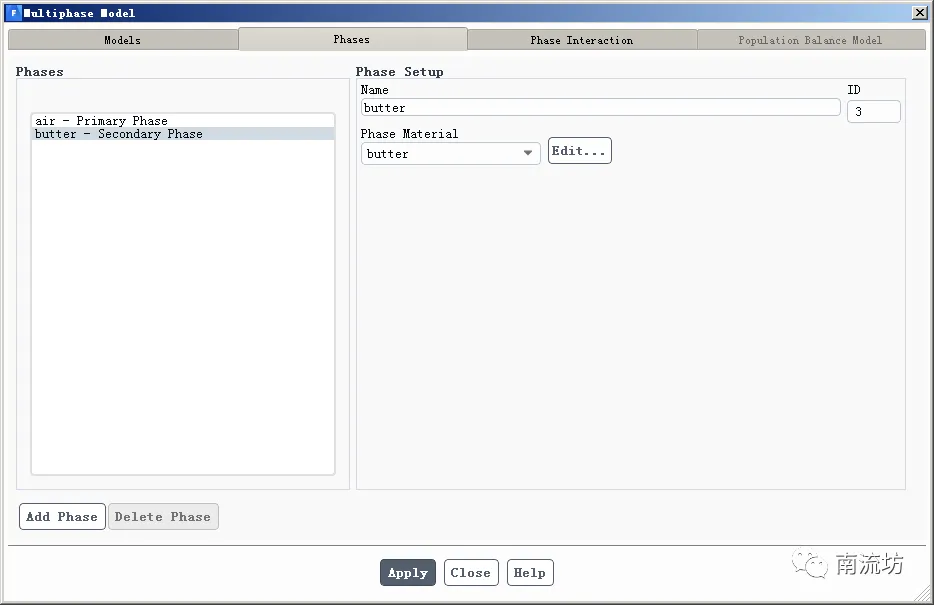
(2) In the “Phases” tab, choose “air” for Phase-1’s material and “butter” for Phase-2’s material. Click OK to confirm and close the dialog.
7. Set Solidification & Melting
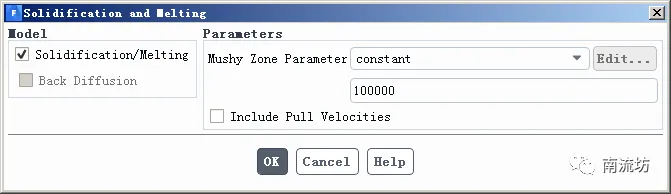
(1) In the “Models” panel, double-click the “Solidification & Melting” button to open the “Solidification and Melting” dialog. Check the “Solidification/Melting” box, and click OK to confirm and close the dialog.
8. Set Boundary Conditions
(1) In the main menu, go to “Physics” → “Zones” → “Boundaries” to open the Boundary Conditions panel.
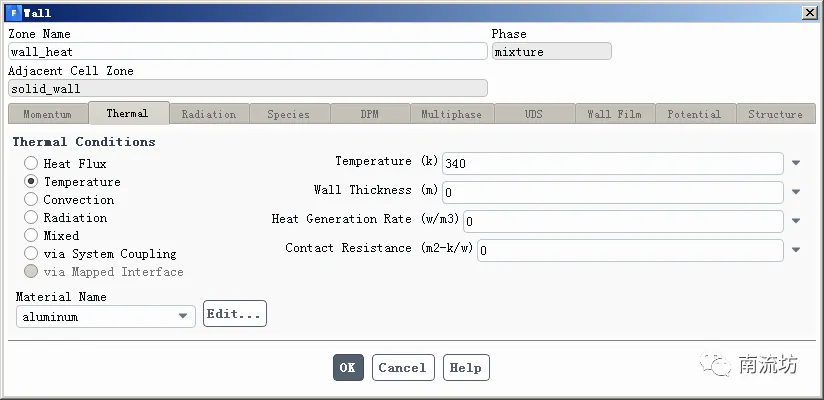
(2) In the Boundary Conditions panel, select the “wall_heat” boundary, and in the “Thermal” tab, set “Temperature” to 340. Click OK to confirm and close the dialog.
9. Set Initial Conditions
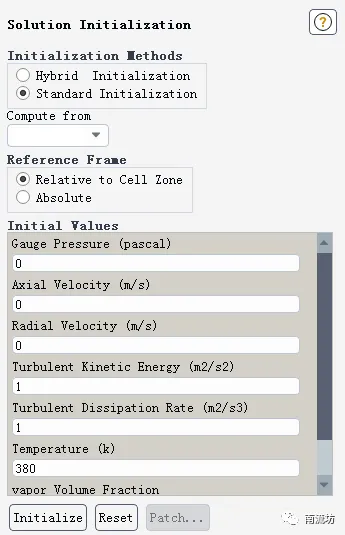
(1) In the main menu, go to “Solving” → “Initialization” to open the “Solution Initialization” panel. Choose “Standard Initialization” and set “Temperature” to 268. Click “Initialize” to initialize the model.
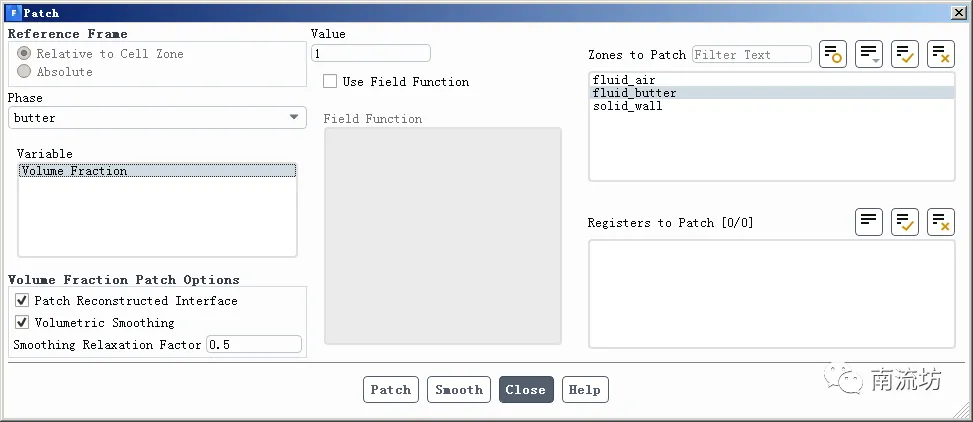
(2) Click the “Patch” button to set the volume fraction of the “butter” phase in the fluid domain (“fluid_butter”) to 1.
10. Run the Calculation
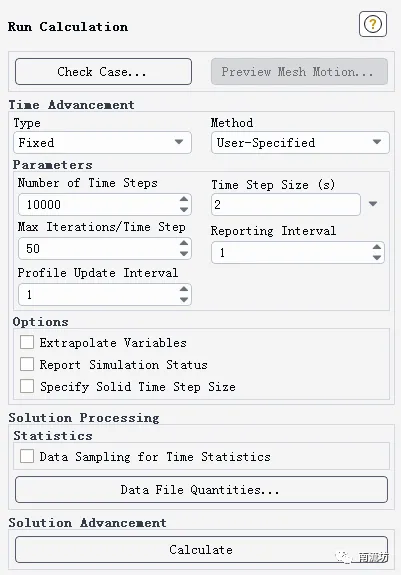
In the main menu, go to “Solving” → “Run Calculation” to open the “Run Calculation” panel.
In the “Time Step Size” field, enter 2. In the “Number of Iterations,” enter 10000. Click “Calculate” to begin the simulation.
11. Post-Processing Results
(1) Double-click on the “Results” item in the A6 section to enter the CFD-Post interface.
(2) Display animations of the results.